Credit & Collections Menu – Overview
1) Define Credit Status Codes
- Open Accounts Receivable → Credit & Collections → Credit Status Codes.
- For each policy you need, add a Code, Description, and choose the Action (W, S, or A).
- Save. You can create as many status codes as your policy requires.
2) Assign Status in Customer Master
- Open Accounts Receivable → Setup & Maintenance → Customer Master Entry.
- Find the customer, then go to the (B)illing module/tab.
- Set the customer’s Credit Status using one of your defined codes.
You may also set the Credit Limits for all customers using Global Update of Customer Credit Values (see below).
The status can be changed later as the customer’s credit standing improves or deteriorates.
3) What Users See (Warning / Stop / Approval)
After a status is set, users will see the appropriate behavior in operations when creating files/entries:
- Warning — Informational message; user can proceed.
- Stop — System blocks the transaction.
- Manager Approval — User must obtain approval to continue.
Standard Credit Values (Defaults)
Use Credit & Collections → Standard Credit Values to define default limits for all newly created customers (e.g., standard limit, terms for warning/hold).
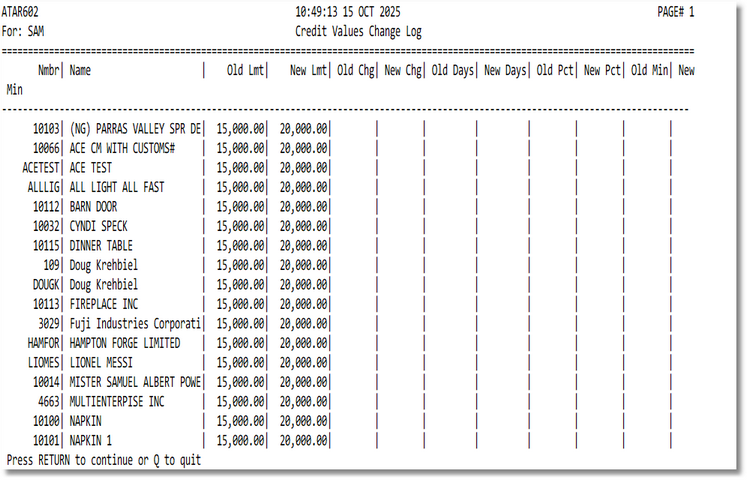
Global Update of Customer Credit Values
Use Global Update of Customer Credit Value to mass‑update existing customers. Filter by previous limits and replace with new values.
- Select the population to update (e.g., by current limit).
- Enter the new standard values.
- Run the update and review the results.
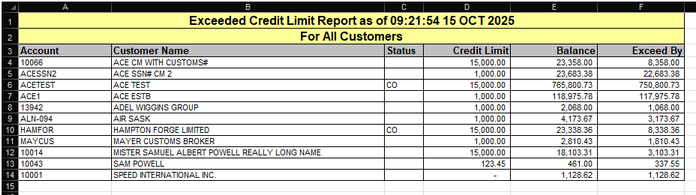
Customer Credit Report
Run the Customer Credit Report to see each customer’s limit, current AR balance, and any over‑limit amounts. Use this to monitor exposure and drive collections activities.
View Credit Report ScreenshotTips & Notes
- Use Manager Approval for temporary exceptions with audit trail.
- Revisit Standard Values annually to match current risk tolerance.