Overview
Important: Only use after confirming the invoice was not mailed to the customer and that no payments or adjustments have been posted against it.
Prompts & Fields
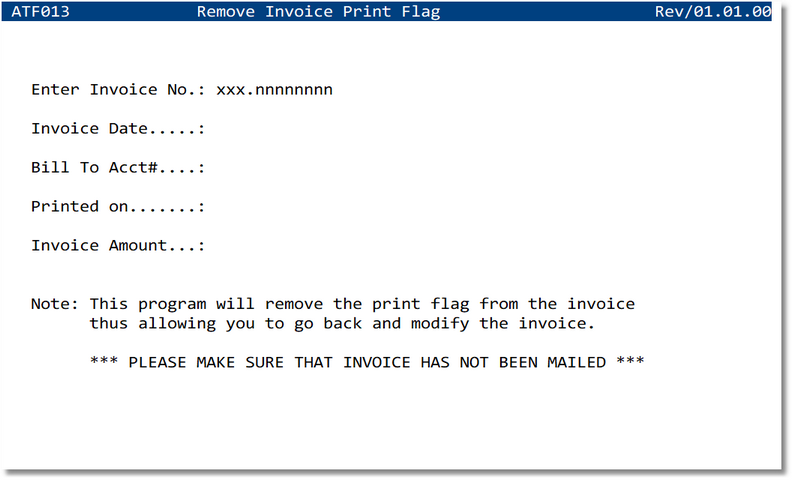
- Enter Invoice No. — Department + Invoice number (format xxx.nnnnnnnn).
- Invoice Date — Display‑only; current date on the invoice.
- Bill To Acct# — Display‑only; customer account code.
- Printed on — Display‑only; date the invoice was previously printed/posted as printed.
- Invoice Amount — Display‑only; total amount of the invoice.
Remove Print Flag — Steps
- Enter the Invoice No. (e.g., 01.3000075).
- Verify the displayed Invoice Date, Bill To Acct#, Printed on, and Invoice Amount.
- Confirm removal when prompted. The print flag is cleared.
- Return to Invoice Entry (or open the invoice) to make corrections and re‑print.
Rules & Safeguards
- Invoice must not have payments or adjustments posted.
- If the customer received the original invoice, void it instead and issue a corrected invoice/credit per company policy.
- Users require appropriate AR permissions to remove the print flag.
- Action is logged with user, timestamp, and invoice number.
What Happens After
- The invoice reverts to not printed status and becomes editable.
- The Printed on stamp is cleared. A new date is recorded when you re‑print.
- No GL postings change as a result of clearing the print flag; edits you make later may affect postings upon re‑print or re‑post depending on configuration.
Troubleshooting
- Invoice locked or cannot be edited → Ensure the print flag was removed and that you have edit rights.
- Invoice has payments/adjustments → You cannot remove the flag; issue a credit/adjustment or follow the void/re‑bill procedure. See How to Change a paid or adjusted Invoice.
- Entered invoice not found → Confirm department and number format (xxx.nnnnnnnn).