Overview
Prompts & Fields
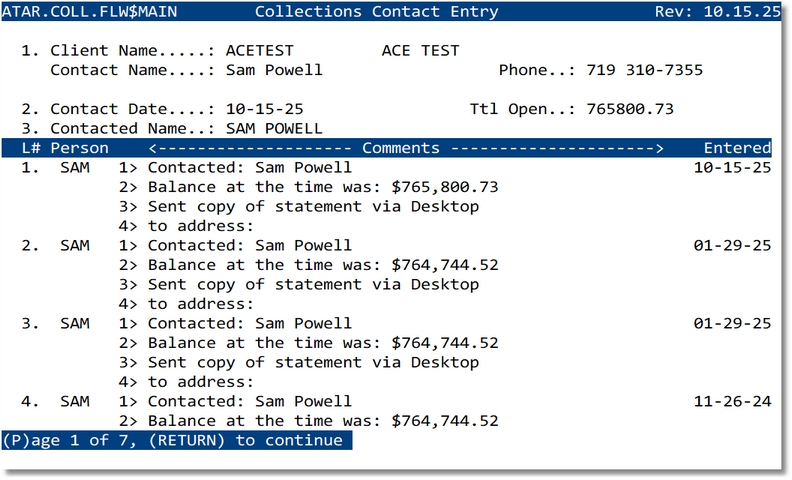
- 1. Client Name / Contact Name / Phone — Customer account, primary contact, and phone.
- 2. Contact Date — Date of the conversation; Ttl Open displays the customer’s total open AR.
- 3. Contacted Name — Person you spoke with.
- 4. FollowUp Date — When you will follow up; used for collections queue.
- 5. Promised Amount — Amount the customer committed to pay; Last Payment Received is shown for reference.
- 6. Message/Notes — Free‑form narrative of the discussion and agreed actions.
Record a Call — Steps
- Verify Client and Contact information.
- Set the Contact Date and FollowUp Date.
- Enter the Contacted Name and the Promised Amount (if any).
- Type detailed Message/Notes capturing commitments and reasons.
- Press P to Post. The entry is saved for review and reporting.
Commands
- Quit — Exit without saving.
- Post — Save the contact log.
- Statement — Quick access to customer statement. (Click to View Sample)
- Invoices — View open invoices for this customer. (Click to View Sample)
- Letter — Generate a collections letter using your templates. (See Additional notes below)
- Review — Open the collections review screen/queue. (Click to View Sample)
Tips
- Write notes in complete sentences; include dates, names, and specific commitments (check number/date if promised).
- Always set a FollowUp Date so the account appears in your next call queue.
Dunning Letters
- For example,
- D1 - First Letter - Requesting Payment
- D2 - Second Letter - Warning of Service Cutoff
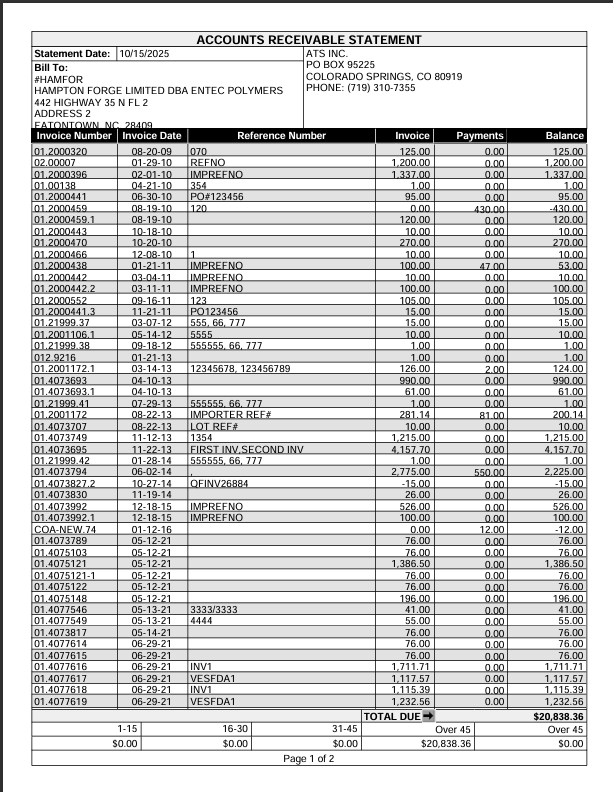
Customer Statement — Sample Output
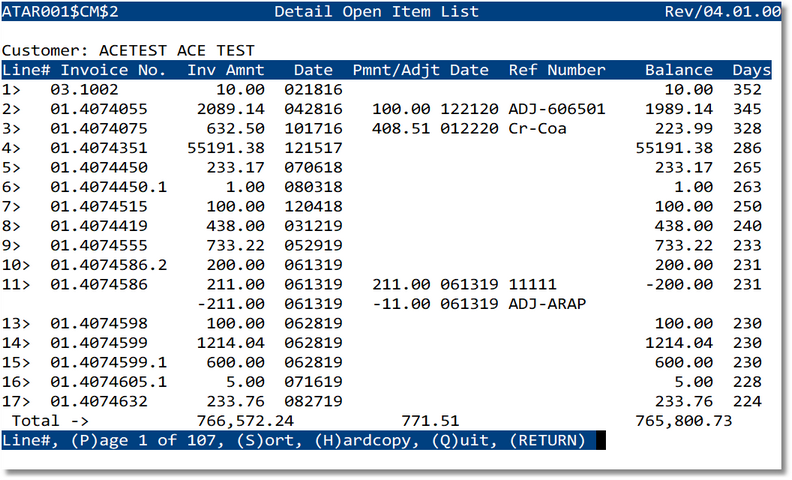
Open Invoices Screen — Sample Output
Client Collections Review Screen — Sample Output
Dunning Letter Sample